App Tutorial#
Overview
We will be using the Windows Manager to create a simple app - Amogus Color Picker. Check out the finished project here: https://scratch.mit.edu/projects/676659143/
Note
Tutorial#
First, go to the boilerplate sprite and set the app name, sprite name, and window boundaries.
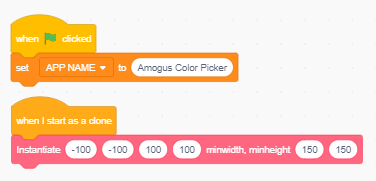

To do this, we draw a rectangle from the bottom left of the screen to the top right.
Make the rectangle have a rounding of 5 to make it look nicer, instead of being sharp.
An hsva value of "0, 0, 100, 100" gives us a nice white background.

Drag the Amogus costume from the Assets sprite to the Desktop Environment sprite.

To render the asset, we call the Render Asset function.
Since we want to center the amogus character, we take the average of the
left and right of the window, as well as the top and bottom. We render the sprite
with a direction of 90 to make the character upright, and a size of 30
since the character is quite big ;)

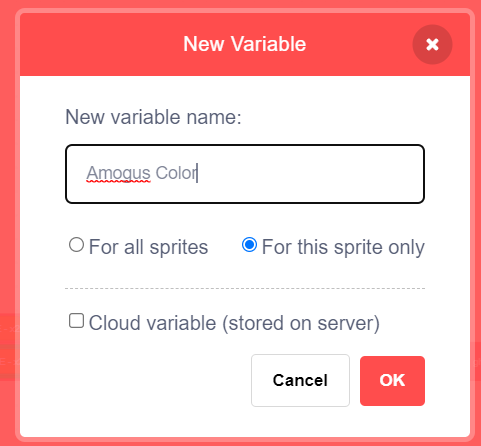
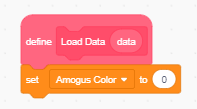
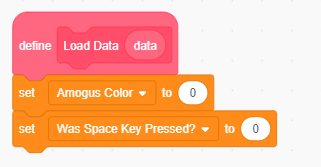
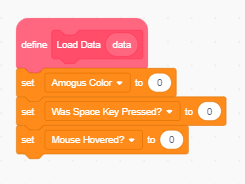
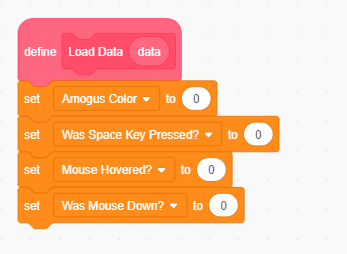
Now let’s make the character change color! Make a variable called Amogus Color
FOR THIS SPRITE ONLY, and initialize it to 0 under the Load Data block.
Then, drag the variable onto the color parameter of the render asset custom block.

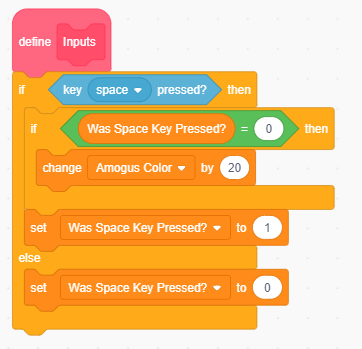
We want to make the amogus character change color every time the space key is pressed. However, holding down the space key shouldn’t continuously change the color. The color should only change the instant the space key is pressed.
Therefore, we keep track of whether the space key was pressed in the previous frame
with the variable Was Space Key Pressed?, and update the color variable if the space
key is currently pressed, but wasn’t on the previous frame.
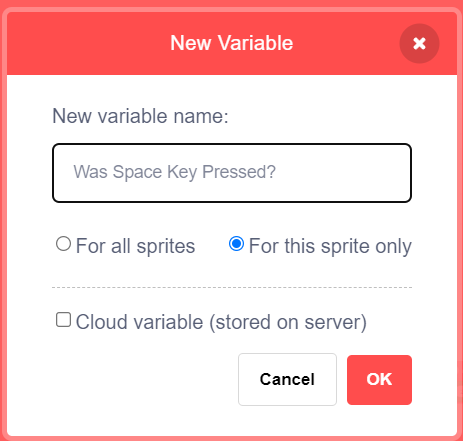
We put all this code under Inputs as pressing space is a non-mouse input. Remember to
initialize the variable as 0 in the load data block.
Now let’s make some buttons that can also change the color of the character.
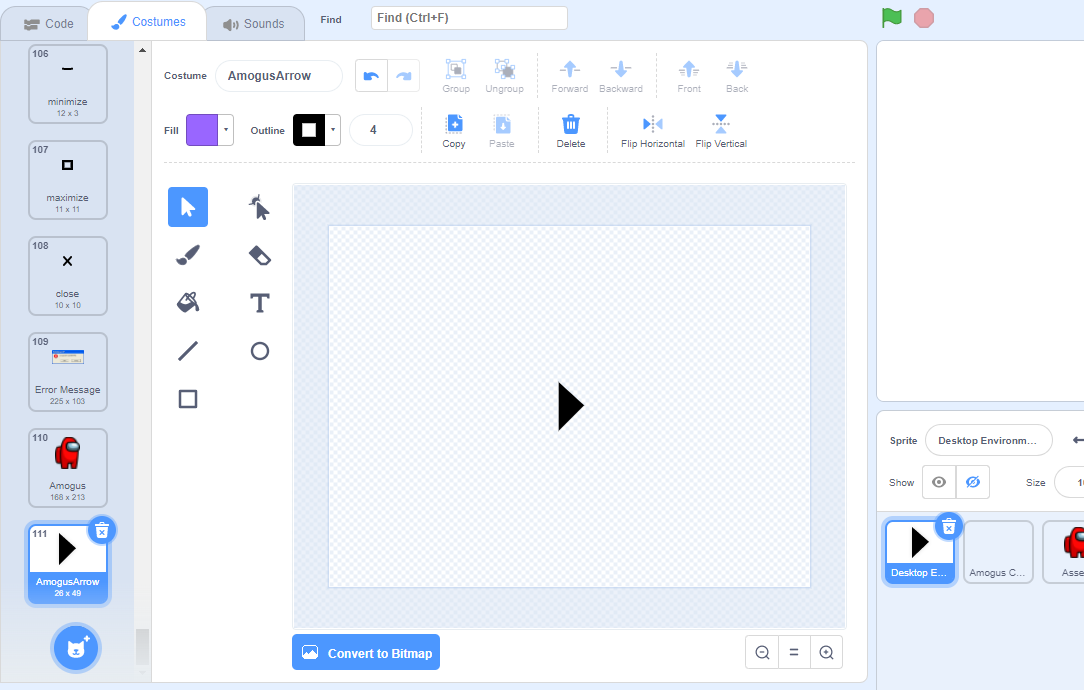
Just like the Amogus costume, drag the AmogusArrow costume from the Assets sprite to the Desktop Environment sprite.
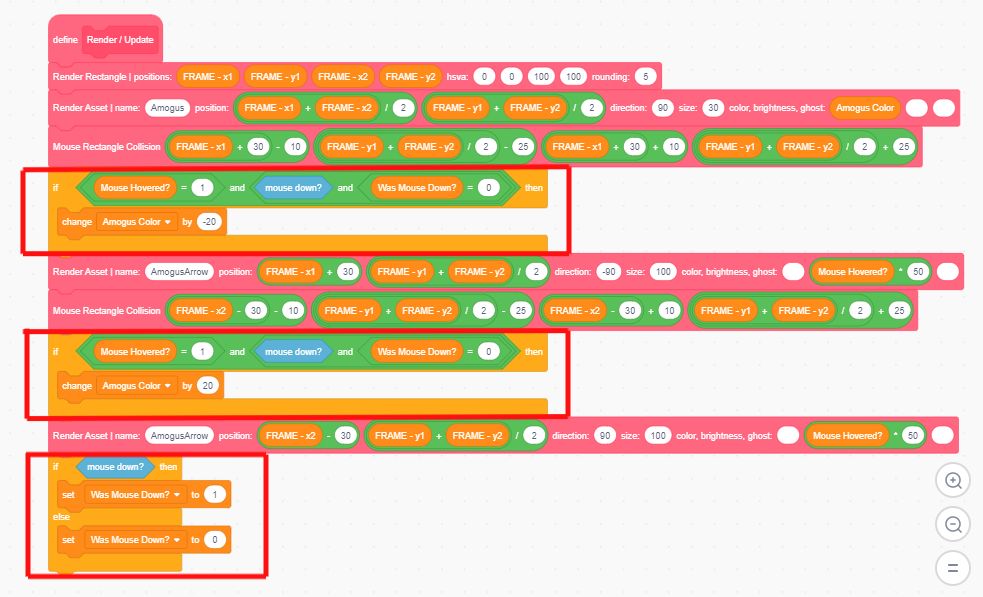
We can then render the arrow under the Render / Update hat block, setting the x
to x1 + 30 (30 pixels from the left of the frame), the y to the center
(average of y1 and y2), size to 100, and direction to -90 (to rotate it the correct way).
We can do this similarly to the right arrow, changing x1 + 30 to x2 - 30 and direction to 90.

To do this, we need to check if the mouse pointer is touching the arrow.
We can upload the arrow costume to the sprite and use the touching mouse pointer block,
but to simplify, we’ll just add a rectangle hitbox around the arrow.

Then, we have to code up a custom block called Mouse Rectangle Collision that detects whether or not your
mouse is hovered over a rectangle. We do this by checking if x1 <= mouse x <= x2
and y1 <= mouse y <= y2 where <= is the less than or equal sign.
Note
Scratch does not have a less than or equal to operator, so instead we use
not greater than to accomplish this.
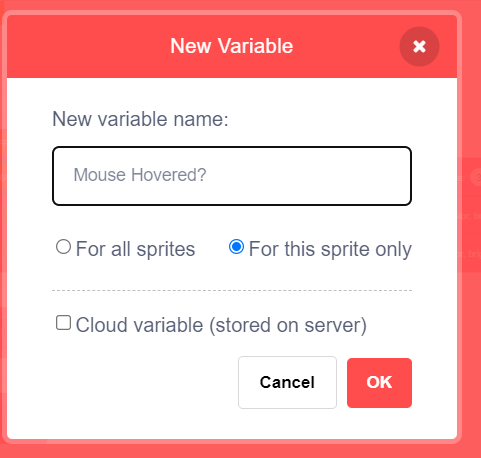
Since scratch functions cannot return a value, we’ll have to create a variable
Mouse Hovered? and have the function update its value. Make sure to
initialize it to 0 in the Load Data function.

Note that the arrow is around 20 pixels wide and 40 pixels tall.
Therefore, we want to subtract 10 from the x and 25 from the y to get (x1, y1)
and add 10 to the x and 25 to the y to get (x2, y2). An illustration is shown below
to show why this is the case.


Drag in the x & y positions of the arrows, and you have your two hitboxes. Put the code that detects the hitboxes right before rendering the arrows
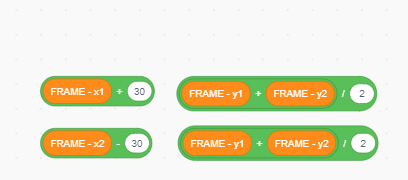
x & y positions of the arrows#

plugging the positions into the function#
Then, with a little hack, we can change the arrows brightness whenever the mouse is hovered.
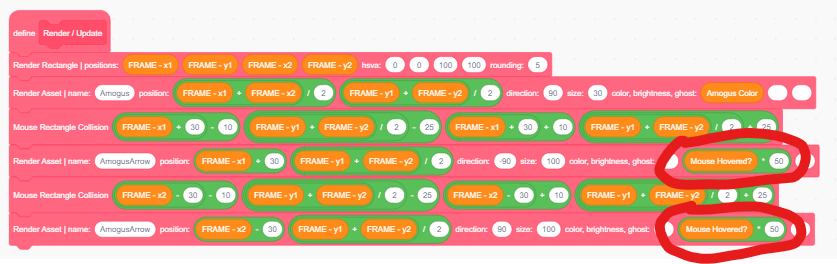
putting the functions into use with the little hack#
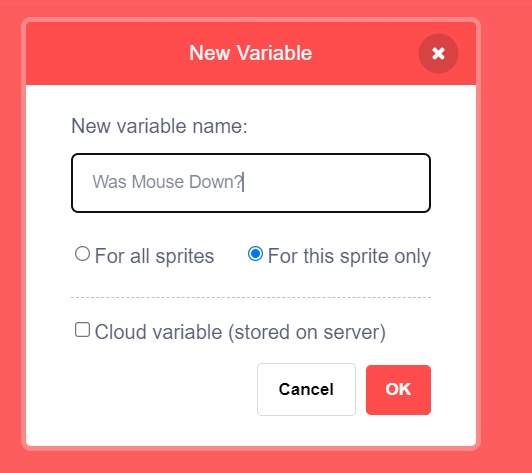
Now, we need to detect if the mouse is down while hovering over the buttons. We can do this similarly to the space key detection we coded earlier.
Create a variable called Was Mouse Down? to keep track if mouse was
down the previous frame, and make sure to initialize it in Load Data
Now, update the Amogus Color variable on the condition that the mouse is
hovered over a button, and the frame before wasn’t clicked. Note that we have to
do this before a second call to the Mouse/Rectangle collision function,
as the second call would override the Mouse Hovered variable, and we don’t want that.
Remember to update the Mouse Down variable at the end.
You have just made an Amogus Color Picker on the Blue OS 7 Windows Manager! Try creating your own app now and see how it works!
Coding Practices#
Guidelines to Follow
Always create variables with “in this sprite only” (unless you need to store a variable that is shared between clones and you know what you are doing)
Try to make costume names unique, so that there are no overlapping costume names
Split processes into custom blocks for organization and better reading