Windows Manager#
Introduction#
Overview
The Windows Manager is the main interface between your code and
the windowing system. We will be learning where and how to call rendering functions,
to make an app for Blue OS 7.
Conventions
(x1, y1) are the bottom left corners of the rectangle (the lesser values), (x2, y2) are the top right.
All pen coloring uses hsva: “Hue, Saturation, Value, Alpha”. Google for more info.
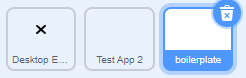
Put all assets in a separate sprite so that we can upload it to the main Window Manager (Alternatively, attach a .zip file of all assets from the app on the app Scratch page so we can add it to the main file).
Setup#

Basics#

Important
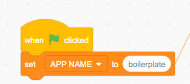
All APP CODE should go under these four functions!
- Load Data
Treat this function as a
When green flag clickedhat block. Sometimes, data may be sent to the app at creation (for example, a picture was opened, and the app was sent the data of the picture)- Receive Data
This is for inter app communication, honestly don’t worry about this hat block until the File Explorer comes out.
- Inputs
Treat this block as a block called inside of a forever loop. However, this block only calls when the app is focused. Update any variables according to any sensing block (besides mouse sensing).
- Render/Update
Treat this block as a block called inside of a forever loop. This block will be called whether or not the window is focused. All code that doesn’t go into
Inputsshould go here. Code including sensing blocks (besides mouse sensing blocks) should NOT go here.
Rendering functions#

Assets are costumes that you would render while an app is running. All assets are stored in the Desktop Environment sprite. Call these functions to render any asset. (they should be pretty straightforward, so I won’t explain everything)
- Render Asset
- First, import an asset to the
Desktop Environmentsprite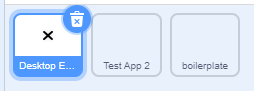
The name of the asset would be the costume name you give it.
- Line Positions
x1, y1, x2, y2, draws a line from
(x1, y1)to(x2, y2)- Rectangle Positions
x1, y1, x2, y2,
(x1, y1)is bottom left,(x2, y2)is top right- Rectangle Rounding
radius of the circle at the corners of the rectangle (0 for sharp corners)
Tip
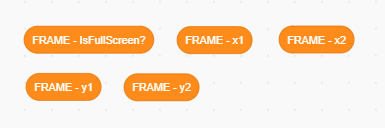
FRAME-IsFullScreen? - 1 if app is in full screen, 0 if app is notFRAME-x1, FRAME-y1, FRAME-x2, FRAME-y2 - (x1, y1) is bottom left of the window, (x2, y2) is the top right of the frame